Linode KVM
Note: AstLinux 1.3.0 or later is required
VM Host Specifications: Linode
AstLinux Board Type:
- “genx86_64-vm” (VGA video console)
VM Guest Recommended Options:
- Plan: Nanode 1GB
- Memory: 1 GB
- CPU: 1 Processor Core
- Virtual Storage: 2 to 16 GB
Configuration:
The configuration process involves several steps:
- Create two “unformatted / raw” virtual disks, one for the ISO installer image and one for the AstLinux boot image
- Create two configuration profiles, one to run the ISO installer, the other to boot AstLinux
- Using “Rescue Mode”
ddcopy the AstLinux ISO Installer to the raw installer image, this involves using the command line - Reboot using the installer configuration profile to install AstLinux onto the boot disk
- Reboot using the boot configuration profile to setup AstLinux
All the steps will be discussed herein, but separate detailed instructions can also be found here: Install a Custom Distribution on a Linode
Before we begin, let's discuss a couple topics.
A hosted VM service like Linode requires some sort of “console” access, Linode offers several. Using the Linodes → Remote Access tab, view the available options.

More Info: Using the Linode Shell (Lish)
Additionally, Linode offers a “Shutdown Watchdog”, enabled by default using the Linodes → Settings tab.

We mention this since your AstLinux “reboot” will only act as a “poweroff” if Lassie is disabled.
OK, let's begin …
Using the Linodes → Dashboard tab, create an installer disk (200 MB) and a boot disk (8000 MB), both of type “unformatted / raw”.


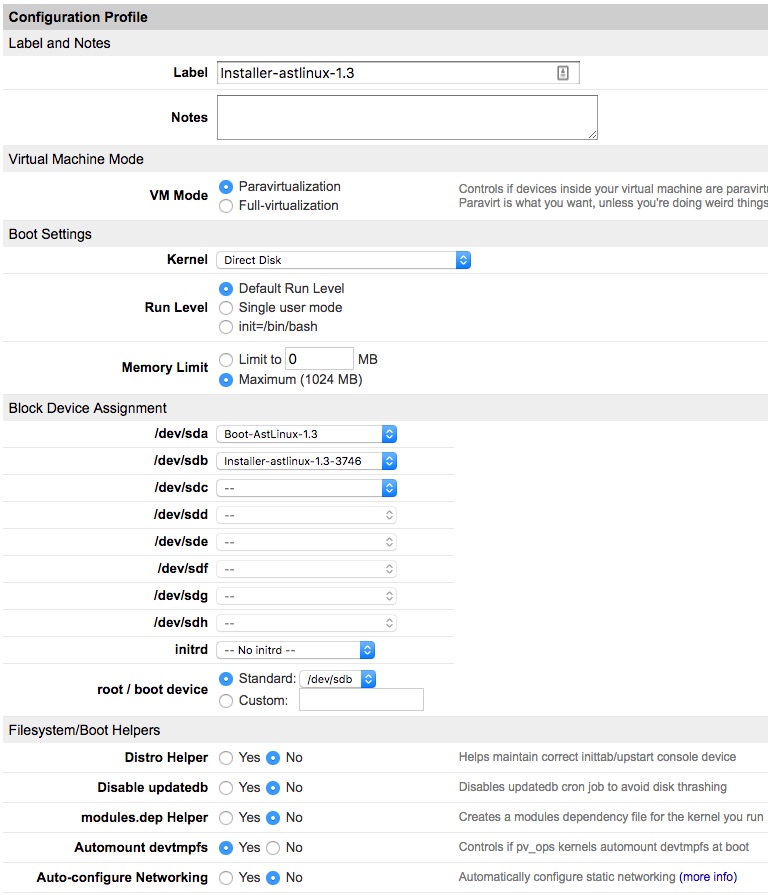
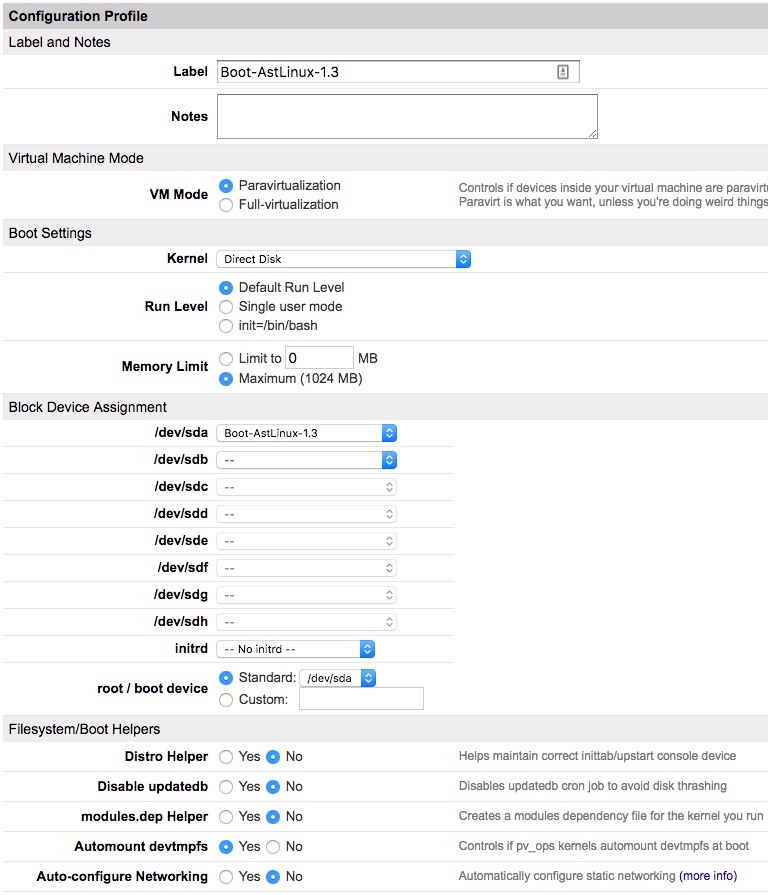
Using the Linodes → Dashboard tab, create two configuration profiles, one to run the ISO installer, the other to boot AstLinux.
Installer Profile:
Tip -> Don't miss that the boot device is set to /dev/sdb
Boot Profile:
Using “Rescue Mode” dd copy the AstLinux ISO Installer to the raw installer image,
we boot into the rescue Linux image to copy the AstLinux Install ISO onto the raw installer disk. Note where the installer disk is mounted, assuming /dev/sda.
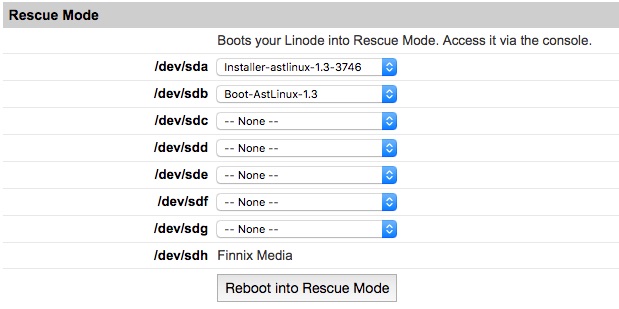
Click “Reboot into Rescue Mode” using Linodes → Rescue
Access Lish via “Lish via SSH” using Linodes → Remote Access
This example command copies the AstLinux 1.3.3 “Guest VM x86-64bit” ISO onto /dev/sda, adjust accordingly.
curl -L --capath /usr/share/ca-certificates/mozilla https://astlinux-project.org/mirror/downloads/iso/astlinux-1.3.3-genx86_64-vm.iso | dd of=/dev/sda
Look for any errors with the curl and dd commands.
Now we are ready to launch the installer, exit the “Lish via SSH” console.

Select “Installer-astlinux-1.3” and click “Reboot” using Linodes → Dashboard
Access Glish via “Launch Graphical Web Console” using Linodes → Remote Access
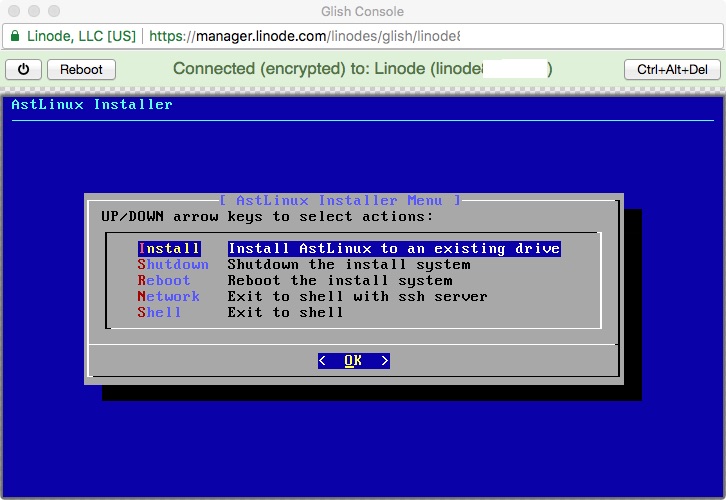
Select the “Install” installer menu, follow the dialogs to install an AstLinux image to your virtual disk.
When finished do not select the “Shutdown” installer menu, if you did Linode's Lassie would just restart it.

Select “Boot-AstLinux-1.3” and click “Reboot” using Linodes → Dashboard
Access Glish via “Launch Graphical Web Console” using Linodes → Remote Access
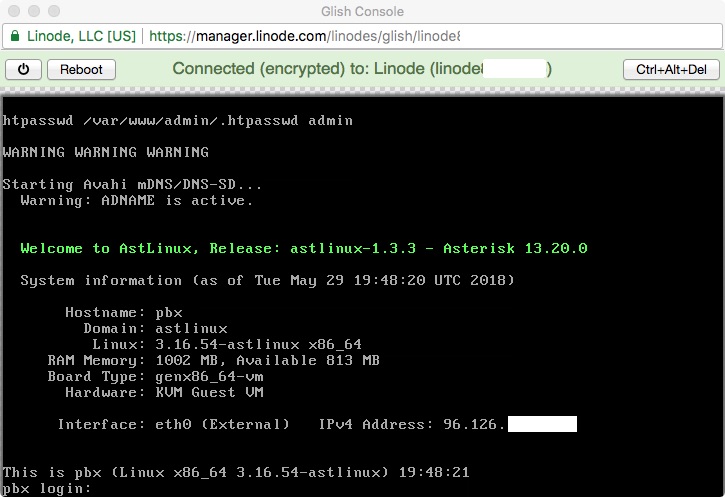
Finally, configure AstLinux using the normal setup.
Tip -> Note the “IPv4 Address:” on the screen and access the VM with SSH or an HTTPS browser from anywhere.
Warning -> It is important to enable the Firewall as soon as possible. Create rules with limited access for TCP ports 22,80,443 (SSH/HTTP/HTTPS) from trusted public addresses.
Out-of-Band Console Access:
Out-of-Band Console Access is an optional feature, but very useful, so enable it.
After you have AstLinux setup with persistent storage and firewall rules applied, out-of-band console access is enabled by editing the /etc/inittab file.
Change this line…
# ttyS0::respawn:/sbin/getty -L 115200 /dev/ttyS0 vt100
to this…
ttyS0::respawn:/sbin/getty -L 19200 /dev/ttyS0 vt100
Tip -> You may want to replace vt100 with xterm-color as the TERM variable setting.
Reboot AstLinux to apply the change.
Below is a sample session to access AstLinux box “linode” via the Linode Shell (Lish).
More Info: Using the Linode Shell (Lish)
## Where <user> is your Linode username
## Where <location> is: dallas, newark, frankfurt, etc.

$ ssh <user>@lish-<location>.linode.com
Linux lish-<location>.linode.com 4.15.13-x86_64-linode106 #1 SMP Tue Mar 27 14:42:14 UTC 2018 x86_64
Linodes located in this data center:
linode123456        Location
[<user>@lish-<location>.linode.com]# linode123456

This is linode (Linux x86_64 3.16.54-astlinux) 13:00:10
linode login: root
Password:
linode ~ # who
root            ttyS0           00:00   May 29 13:00:19
linode ~ # exit
logout

This is linode (Linux x86_64 3.16.54-astlinux) 13:00:47
linode login:
Tip -> Access occurs via a screen console session.
To exit, type Control-A then D then D and finally exit to return to the starting shell.