Hyper-V
Note: AstLinux 1.2.10 or later is required
VM Host Specifications: Hyper-V
VM Host Requirements: Windows Server 2008 or newer, Windows 8 Professional or newer versions (64-bit)
AstLinux Board Type:
- “genx86_64-vm” (VGA video console)
VM Guest Recommended Options:
- Memory: 512 to 1024 MB
- CPU: 2 Processor Cores
- Virtual Storage: 4 to 8 GB
- Network: Virtual Switch (Bridged Interface)
Assumptions:
- A working installation of Hyper-V Server. These instructions use Hyper-V Server 2012R2.
- A Virtual Switch configured within Hyper-V Server.
- Hyper-V Manager available, with the necessary permissions on the server.
- AstLinux installation ISO copied to local storage on the server.
Configuration:
Special Thanks -> Nick Mace graciously provided the following configuration detail.
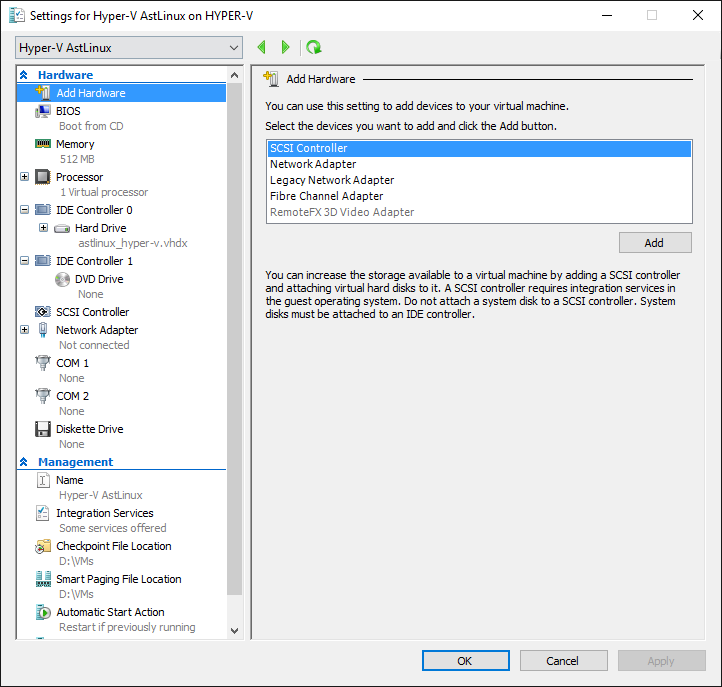
Create a new virtual machine using Hyper-V Manager. If using Hyper-V Server 2012R2 or later, you must select a “Generation 1” virtual machine. The screenshot below shows a new virtual machine with the default configuration and a virtual hard disk attached:
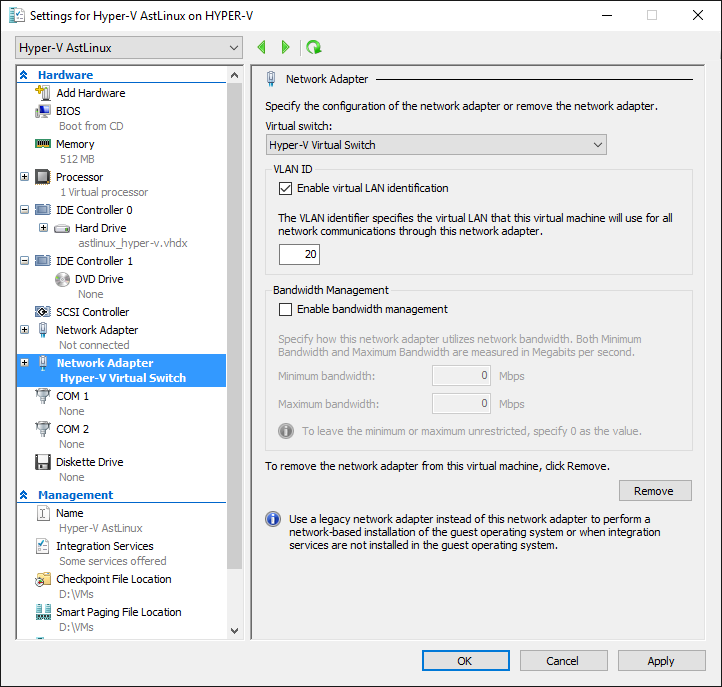
Add a new “Network Adapter”. Select the Virtual Switch to attach the network adapter to. Note that the VLAN ID for the network adapter is specified here:
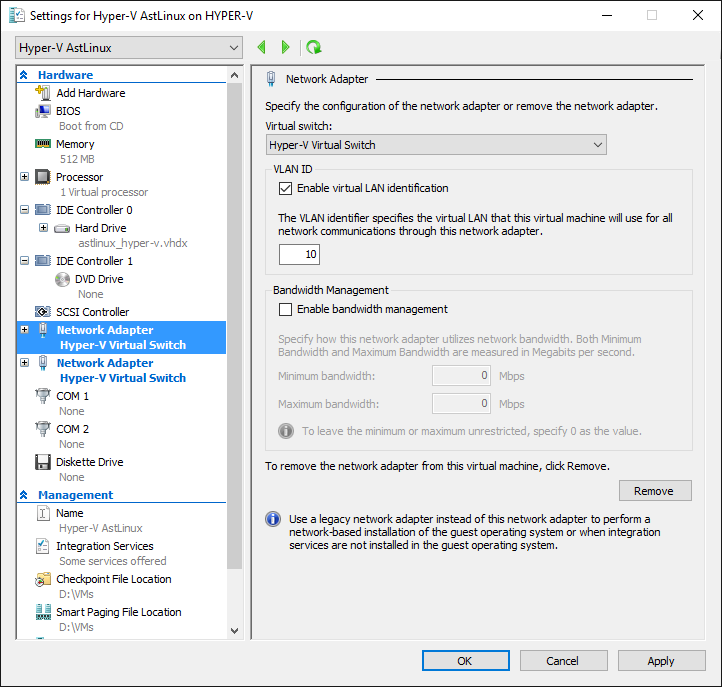
Configure the remaining network adapters, specifying the VLAN ID for each:
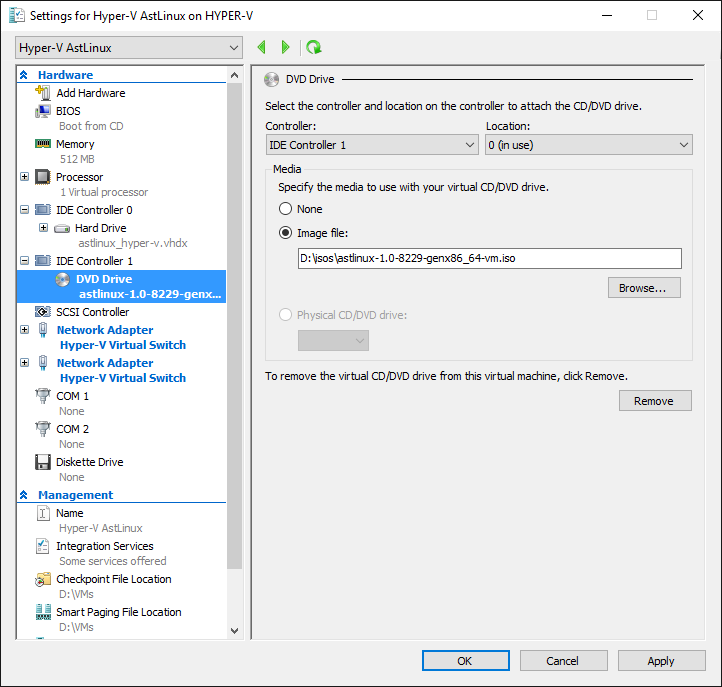
Browse to the AstLinux installation ISO and mount this on the DVD drive:
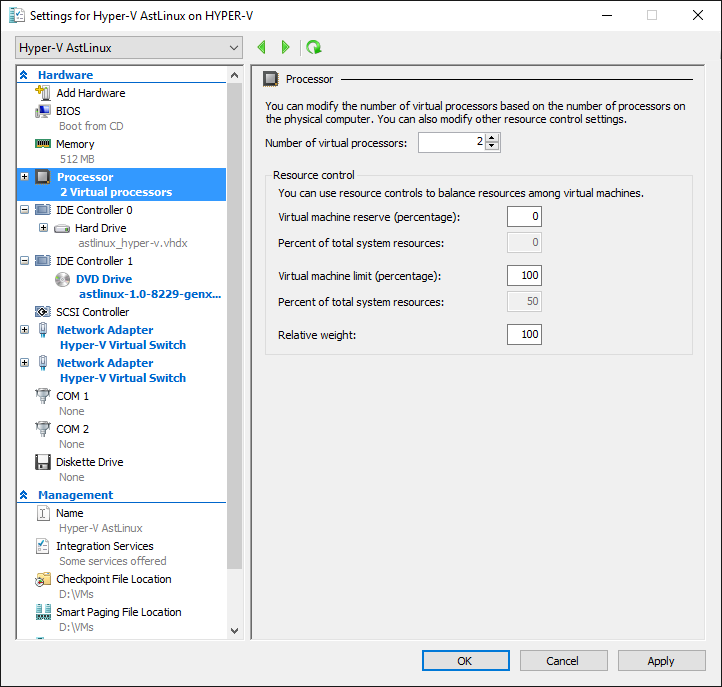
Set the required number of virtual processors:
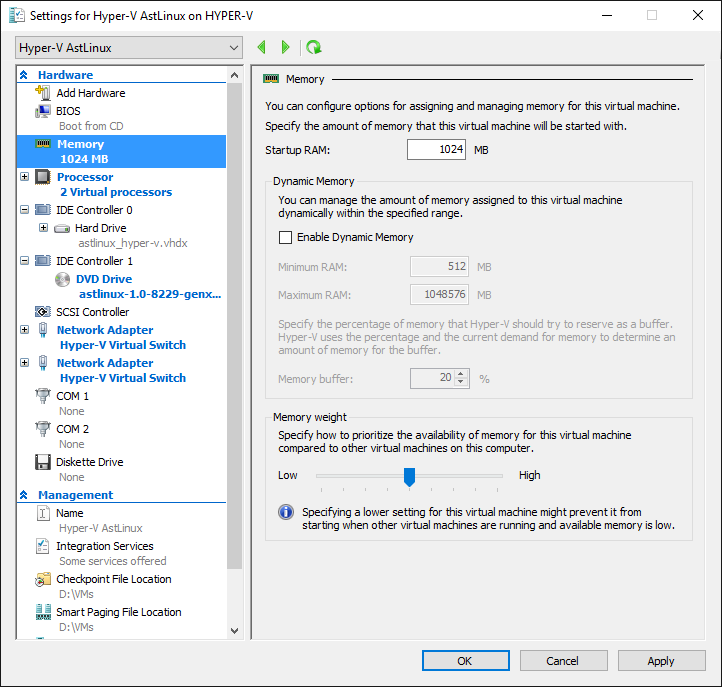
Set the required amount of memory:
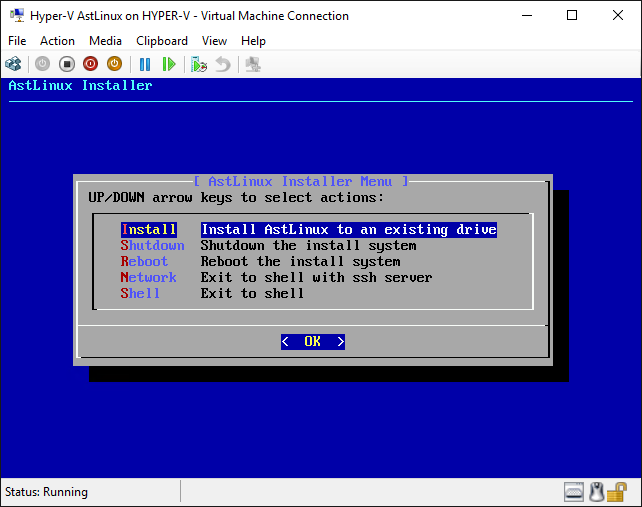
Save the changes to the virtual machine. Connect to the virtual machine through Hyper-V Manager and start it. The AstLinux Installation ISO will boot and the installer will run. Choose the “Install” option:
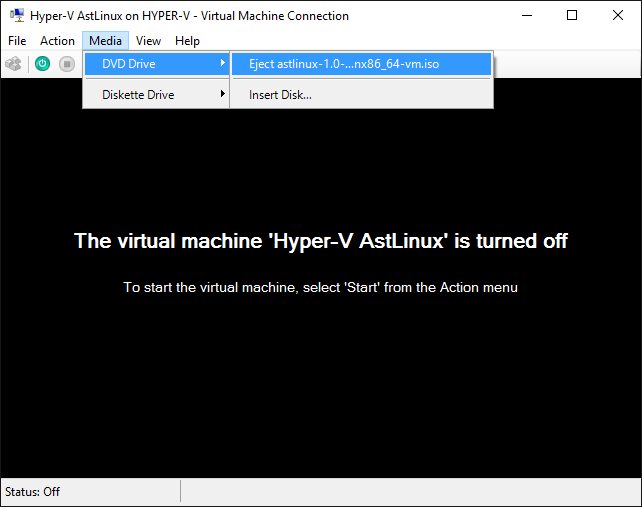
Choose the version of Asterisk to be installed. Confirm the target install disk (there will be only one, unless further disks were added to the virtual machine). Confirm that disk should be overwritten. The 3 stages of installation will run: validating the AstLinux image; erasing the first 1GB of the disk; writing the AstLinux image. This should take only a few minutes. Once the installation has finished, choose the “Shutdown” option. Eject the AstLinux installation ISO:
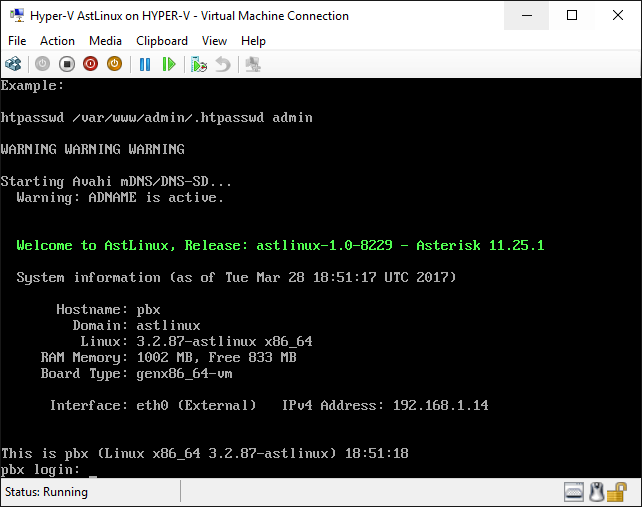
Start up the virtual machine. AstLinux will boot. The Hyper-V hypervisor will be detected and the Hyper-V kernel modules will be loaded automatically. The first network adapter will be brought up and will acquire an IP address through DHCP. At the end of the boot process, the IP address will be shown:
Finally, configure AstLinux using the normal setup.
Tip -> Note the “IPv4 Address:” on the screen and access the VM with SSH or an HTTPS browser on the same network.