VirtualBox
Note: AstLinux 1.2.5 or later is required
VM Host Specifications: VirtualBox
AstLinux Board Type:
- “genx86_64” (VGA video console)
- “genx86_64-vm” (VGA video console, including KVM and virtio drivers)
VM Guest Recommended Options:
- Memory: 512 to 1024 MB
- CPU: 2 Processor Cores
- Virtual Storage: 4 to 8 GB
- Network: Bridged Interface
Configuration:
Create a new Virtual Machine using “Expert Mode” …
Specify Name, Type and Version. Set Memory size to 512 to 1024 MB:
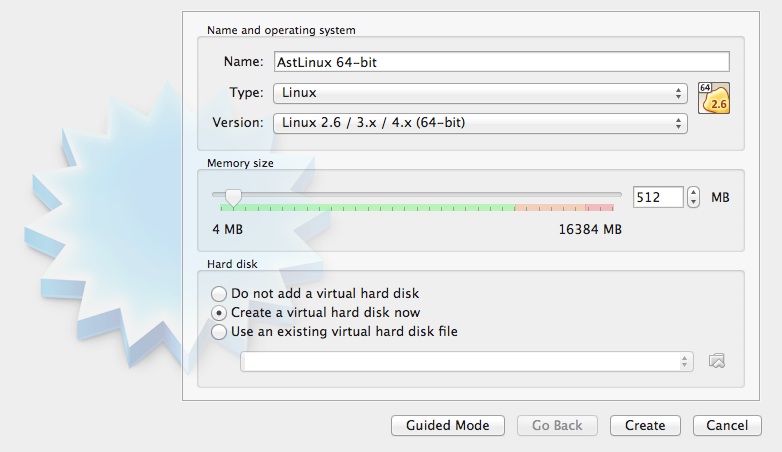
Click “Create”…
Specify the Hard Disk size, the default is 8 GB, 4 GB should also work well for AstLinux.
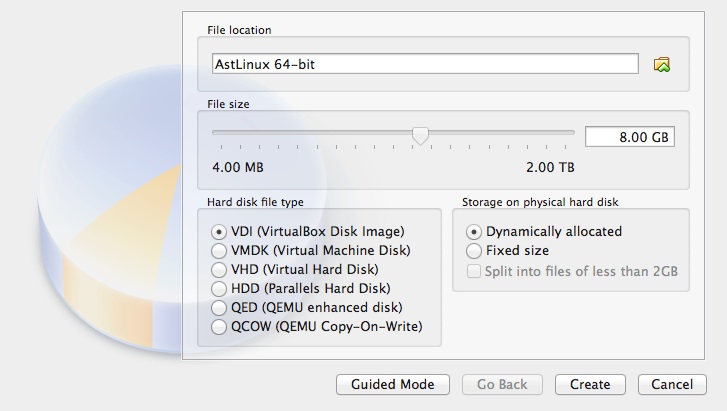
Click “Create”…
The basic VM is finished, but we need to specify a few more configuration options.
Select “Settings” → “Storage” and click on the “Empty” CD/DVD IDE optical drive:
Click on the the icon right of “Optical Drive: [ IDE Secondary Master ], then “Choose Virtual Optical Disk File…”
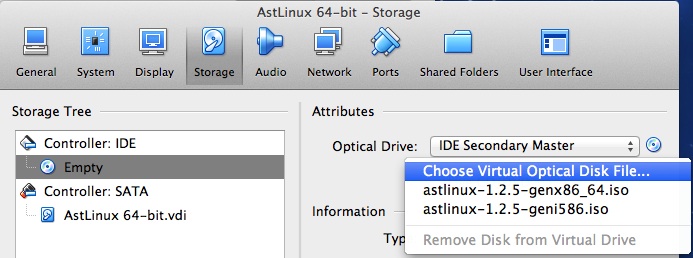
Select the downloaded “astlinux-NNN-genx86_64.iso” ISO file:

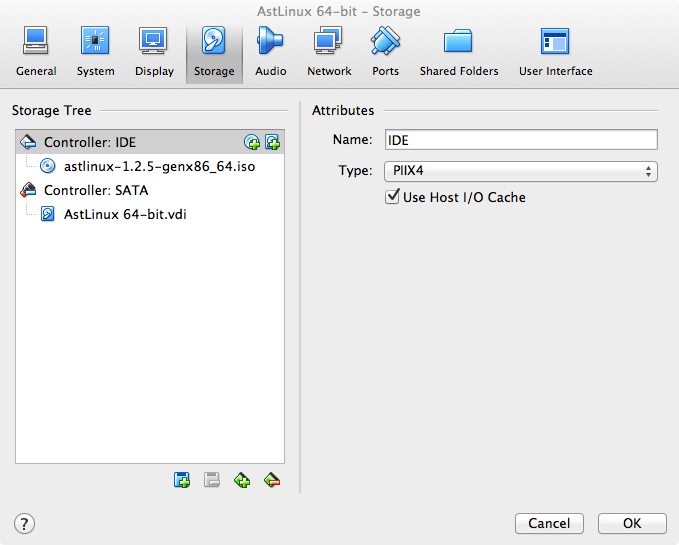
Click “OK”…
Select “Settings” → “System” → Processor, set 2 Processor CPUs:
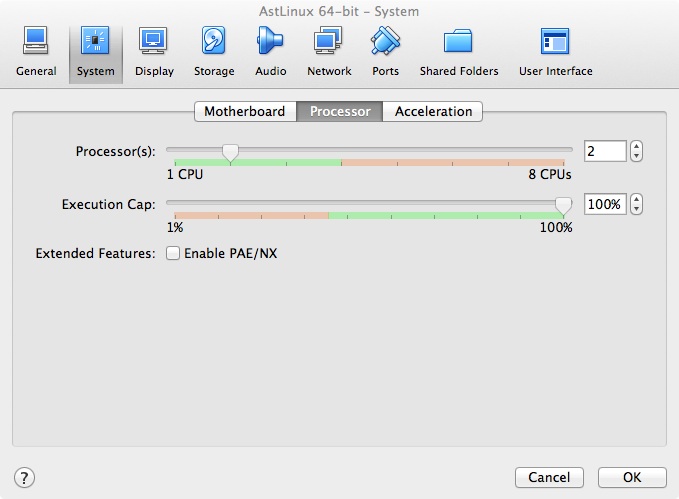
Click “OK”…
Select “Settings” → “Network” → Adapter 1, set “Bridged Adapter”:
(Use 'en0: Ethernet 1' for single interface host)
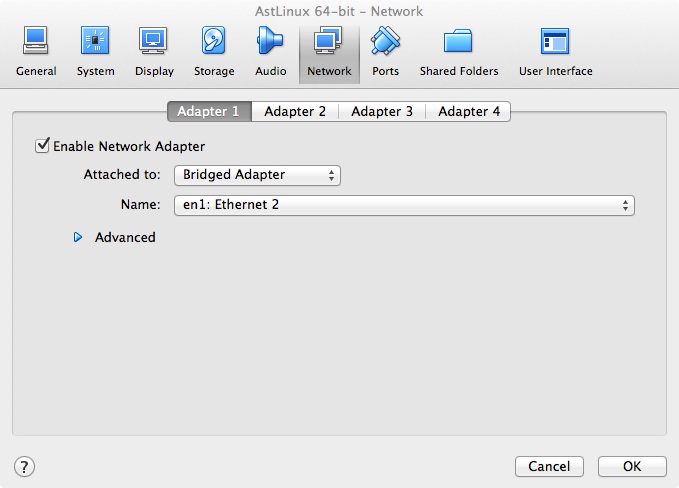
Click “OK”…
Select “Settings” → “Audio”, uncheck “Enable Audio”:
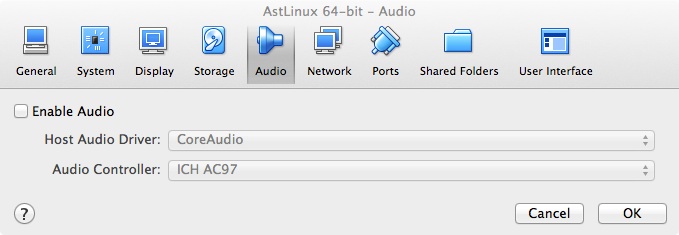
Click “OK”…
Next, Install AstLinux, “Start” the VM, after a few seconds you should see the AstLinux Installer:
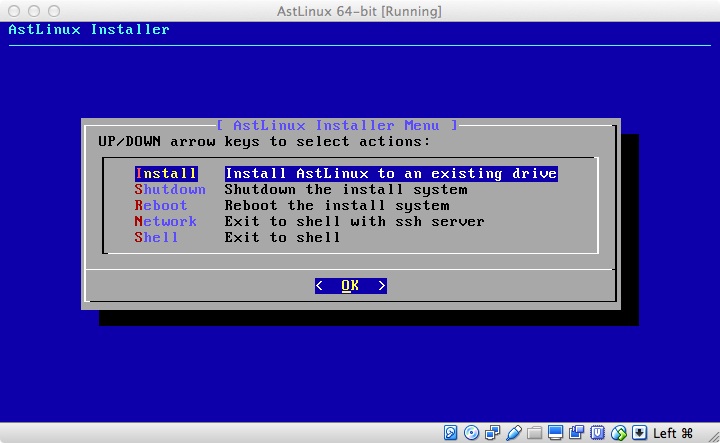
Select the “Install” installer menu, follow the dialogs to install an AstLinux image to your virtual disk.
When finished select the “Shutdown” installer menu.
After shutdown, Select “Settings” → “Storage” and remove the AstLinux ISO from the optical drive:

It should now show “Empty”. Click “OK”…
Then “Start” the VM again:
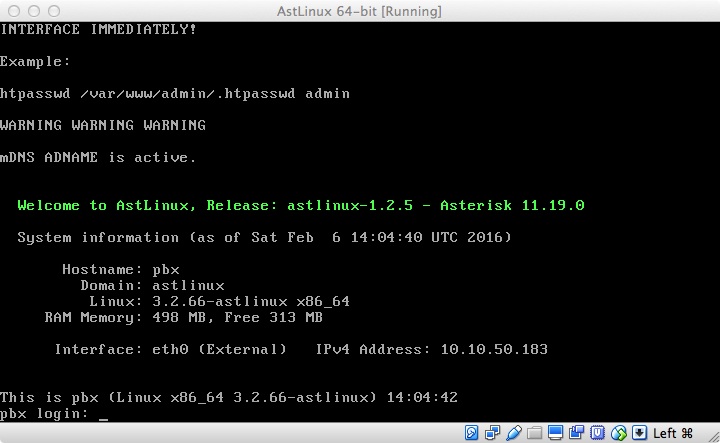
Finally, configure AstLinux using the normal setup.
Tip -> Note the “IPv4 Address:” on the screen and access the VM with SSH or an HTTPS browser on the same network.