Table of Contents
IPsec VPN Configuration
The popular Apple iOS platform has limited VPN options, one of which is IPsec (Cisco) which uses IPsec + XAuth.
IPsec + XAuth with certificates is supported in AstLinux 1.0.3 .
Apple iOS 5.1 or later is recommended, iOS 4.2 has been shown to work with the settings described below, except NAT Traversal is not supported in iOS 4.2 .
For OS X IPsec client support, 10.6.8 (Snow Leopard) or later is recommended.
For Windows IPsec client support, XP, Win 7 or later is recommended.
Note: AstLinux 1.0.3 or later is required
IPsec Mobile Server Configuration
The AstLinux Web Interface is used for configuration, click on IPsec Configuration
Network tab → VPN Type:

The following IPsec Mobile Server Configuration (below) must be specified. The only unique option is the Server Cert DNS Name: setting. This must be the DNS name of the server, such as vpn.mydomain.com . Wildcards may be used for iOS devices, such as *.mydomain.com or vpn.*.mydomain.com. This defines the subjectAltName object in the CA certificate.
Note: * by itself can't be used. Additionally if OS X clients are supported, don't use wildcards.
Tip 1-> If you had previously enabled IPsec Mobile, you must re-create your Server/CA Certificates to be compatible with Apple iOS.
Tip 2-> The Private Key Size: must be 2048 Bits before creating a new certificate.
Tip 3-> Visit the Prefs Tab → Distinguished Name: to define your certificate objects.
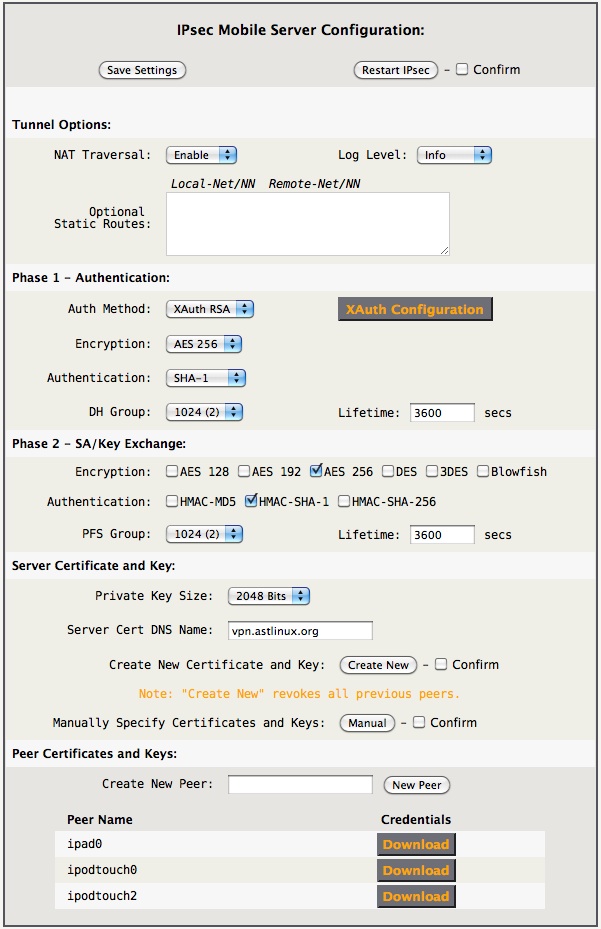
After all the options are specified, click Create New

Next, create New Peer Client certificates/keys, such as ipad0 as above.
Then, click XAuth Configuration to configure the client options, example below.
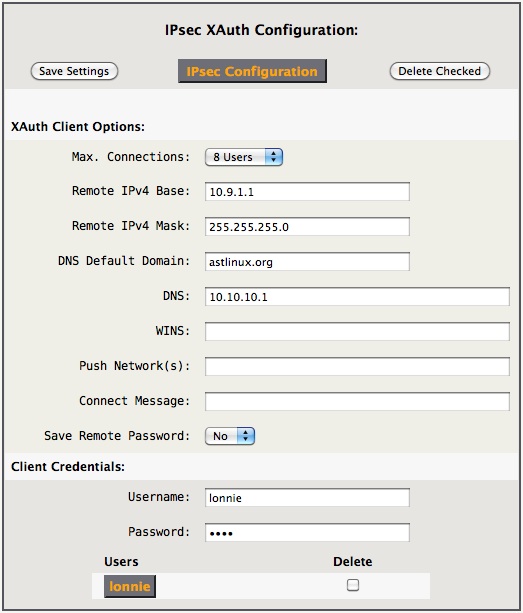
- Max Connections: Select the maximum number of simultaneous connections.
- Remote IPv4 Base: The starting address of the client connections as seen by the server.
- Remote IPv4 Mask: The network mask, usually 255.255.255.0 for a /24 network.
- DNS Default Domain: When DNS is defined, non-fully-qualified names will be forwarded using those DNS servers.
- DNS: A space separated list of one or more DNS servers accessed via the VPN.
- WINS: A space separated list of one or more WINS servers accessed via the VPN, usually left empty.
- Push Networks(s): Optional space separated list of one or more networks that only will be routed via the VPN. Apple iOS devices will send all traffic through the VPN if this is left empty. Example:
192.168.100.0/24 - Connect Message: Optional message displayed on the client when the VPN is established.
Multiple Username/Password pairs may be defined. Any of these client credentials may be used with any client peer certificate. There is no implied association.
Click IPsec Configuration to return to the IPsec Mobile Server Configuration tab.
Tip 4-> Be sure to Restart IPsec to apply all the changes.
Congratulations, you have the IPsec Server configured and running, next is to setup your iOS devices.
Apple iOS Client Configuration
After the IPsec server is configured and certificates generated, the final step is to install the CA and Peer certificates on the iOS device.
From the IPsec Mobile Server Configuration tab, download the credentials for the desired peer, ipad0 for this example.

Unzip the resulting credentials-ipad0.zip file on your desktop, you will see the following files.
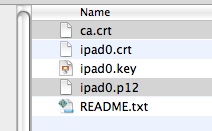
Next email the CA certificate (ca.crt) and Client Peer certificate/key (ipad0.p12) to yourself, so the email can be received on your iOS device.
Be very certain you only email the ''ca.crt'' and encrypted ''peer-name.p12'' files.
Keep the README.txt file handy, you will need the enclosed PKCS#12 Container Password in order to install the encrypted ipad0.p12 certificate.
The resulting email will appear on your iOS device something like below.
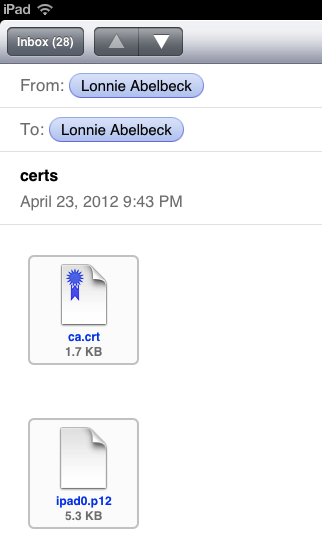
Install the certificates by single tapping on each of the certificate attachments, start with the ca.crt attachment, follow the prompts to install it. Do the same for the ipad0.p12 attachment, this will require the PKCS#12 Container Password from the README.txt file.
The final step is to configure the VPN, go to…
Settings → VPN → Add VPN Configuration…
Tap on IPSec and fill in screen as follows:
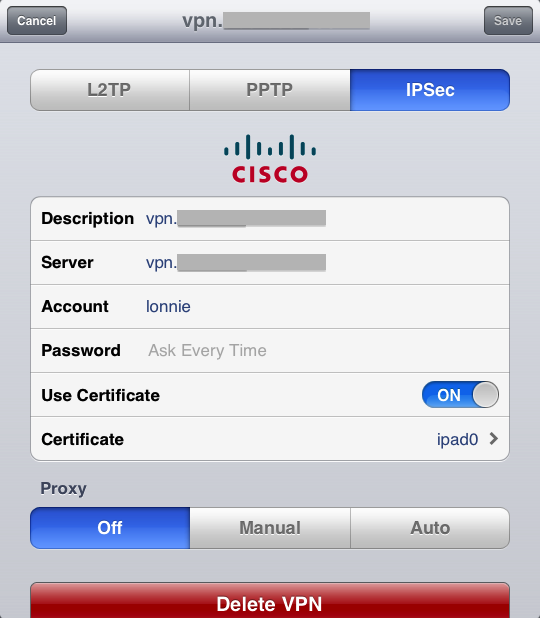
The Account corresponds to any Username defined in the IPsec XAuth Configuration tab in AstLinux. It is suggested to not save the password, this protects security should the iOS device become lost.
Slide Use Certificate to ON, and select the ipad0 certificate.
Tap Save, you are finished! Slide VPN to ON to establish a VPN.
Apple OS X Client Configuration
After the IPsec server is configured and certificates generated (above), the final step is to install the CA and Peer certificates on your OS X notebook or desktop computer.
From the IPsec Mobile Server Configuration tab, download the credentials for the desired peer, mb13 for this example.

Unzip the resulting credentials-mb13.zip file on your desktop, you will see the following files.
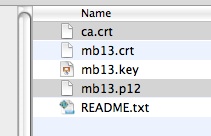
Installing the certificates is not as slick as with iOS, but not too complicated. Use the application Keychain Access, found in the Applications/Utilities folder, to import the certificates.
Note: You will be prompted for your admin password many times through this process, and one time the PKCS#12 container password found in the README.txt file.
![]()
Using the application Keychain Access, File → Import Items…
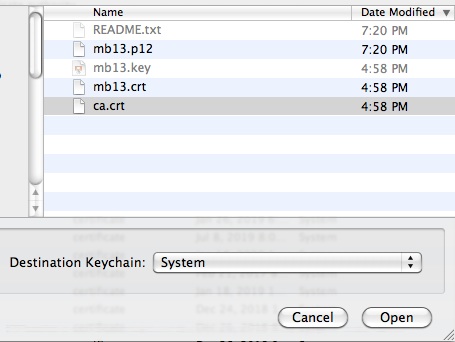
Select ca.crt, make sure the Destination Keychain is System. Once installed, select the certificate just installed and do a File → Get Info, then click down the Trust triange to show more and then select Always Trust for When using this certificate:.
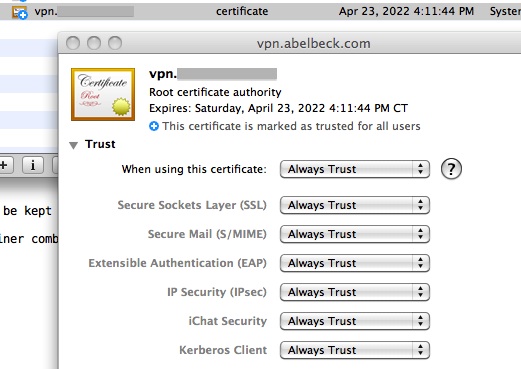
Close the Get Info window above to apply the change. At this point quit the application Keychain Access, and then immediately launch the application Keychain Access again.
Using the application Keychain Access, File → Import Items…
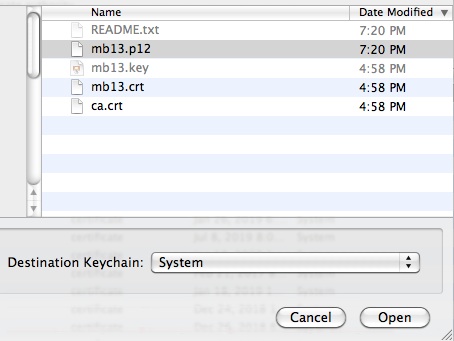
Select peer-name.p12 (mb13.p12), make sure the Destination Keychain is System. You will be prompted for the PKCS#12 container password found in the README.txt file.
Special Note for Mac OS X 10.8, just as above where the ca.crt must be given Always Trust permissions via File → Get Info, click on the little triangle in front of the CA to expand it to show the “private key”, select it and give access via File → Get Info, click Access Control then click “Allow all applications to access this item”. Click Save Changes and follow the prompts.
Quit the application Keychain Access.
The final step is to configure the VPN, go to the System Preferences and click on Network.
Click the + (Create a new service) and fill out the dialog as below:

Enter the Server Address, Account Name and optionally Password.
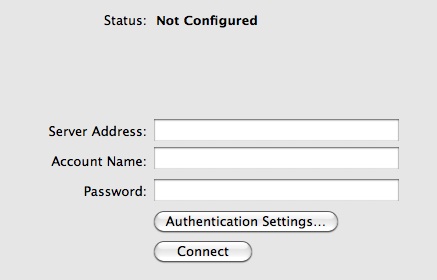
Click Authentication Settings…
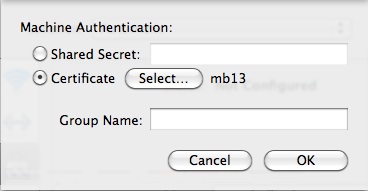
Select Certificate, and click Select… to choose the certificate you installed earlier, then click OK.
Click Apply, you are finished! Click Connect to establish a VPN.
Windows Shrew Soft Client Configuration
Download Shrew Soft VPN Client
Install the Shrew Soft VPN Client on your Windows notebook or desktop computer.
After the IPsec server is configured and certificates generated (above), the final step is to download the CA and Peer certificates.
From the IPsec Mobile Server Configuration tab, download the credentials for the desired peer, mb13 for this example.

Unzip the resulting credentials-mb13.zip file on your desktop, you will see the following files.

The Shrew Soft VPN Client (v2.1.7) does not support saving the password for protected .p12 containers, so the unencrypted mb13.key, mb13.crt and ca.crt, can be installed somewhere the Shrew Soft VPN Client can find them. Be certain to transport the mb13.key file securely.
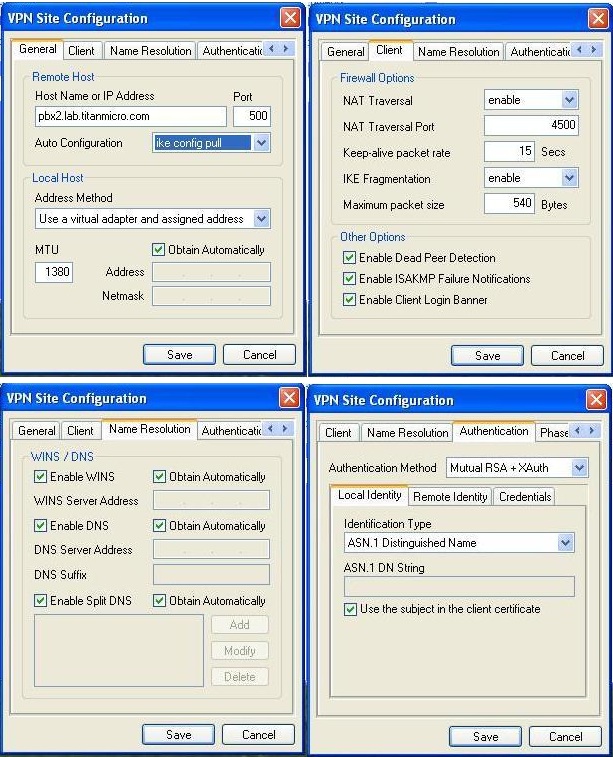
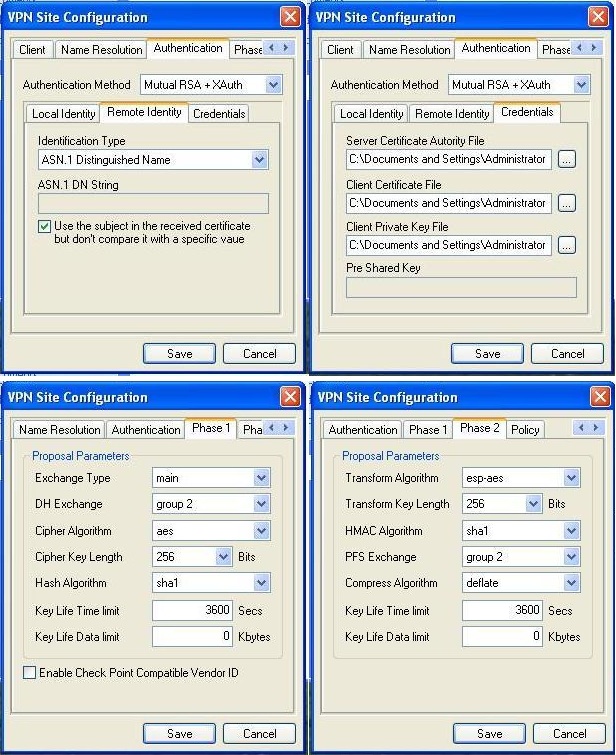
Shrew Soft VPN Client (v2.1.7) example: (Submitted by Tom Mazzotta)
The Shrew Soft VPN Client does not access certificates installed into the Windows certificate store, so you need to copy your certificate files to a folder where they can be found. The installer creates the folder:
C:\Documents and Settings\Administrator\My Documents\Shrew Soft VPN\certs
It is suggested to copy the CA cert (ca.crt), client cert (mb13.crt), and unencrypted client private key (mb13.key) for the client cert, to that location. Select these files using the “Authentication | Credentials” tab.
Technically, the Shrew Soft VPN Client supports encrypted client certificate .p12 containers, but you need to enter the container password every time (a real pain), so it makes more sense to use the unencrypted key with this product.
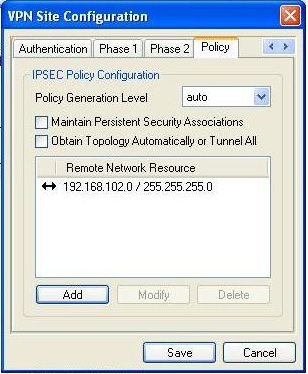
To enable split tunneling, add the networks found on the LAN side of your Astlinux box to the list on the “Policy” tab (192.168.102.0/24 in this example).
