Table of Contents
SSL/HTTPS with FOP2 (ACME Certificate)
Note: AstLinux 1.3.0 or later is required
If you access FOP2 via an HTTPS connection, FOP2 can be configured to use SSL, internally secure websockets wss:, as such most modern browsers expect valid certificates for secure websocket connections. While it is possible to create a self-signed certificate and deploy it to all your FOP2 client devices (see next section), a far more convenient approach is to generate globally valid
ACME (Let's Encrypt) Certificates that the FOP2 client devices can validate by following the global certificate chain.
At minimum, The “HTTPS Server” ACME Deploy Service must be checked, ACME certificate issued and deployed using
ACME (Let's Encrypt) Certificates. The /mnt/kd/ssl/https_stunnel_server.pem PEM file should now exist.
Edit the /etc/fop2/fop2.cfg file and uncomment (enable) and edit the following lines:
ssl_certificate_file=/mnt/kd/ssl/https_stunnel_server.pem
ssl_certificate_key_file=/mnt/kd/ssl/https_stunnel_server.pem
Then you must “Restart Asterisk FOP2” (not just Reload) in order for SSL to be enabled.
By using an ACME Certificate, in theory, any modern HTTPS web browser or device should be able to securely use FOP2.
SSL/HTTPS with FOP2 (Self-Signed Certificate)
Note: AstLinux 1.1.3 or later is required
In the web interface, enter your personal certificate settings in “Prefs Tab → Distinguished Name”, then check “Create New HTTPS Certificate” in the “Network Tab → HTTPS Certificate File”, “Save Settings”, and Reboot.
Tip -> Skip the above if you have done this previously.
Edit the /etc/fop2/fop2.cfg file and uncomment (enable) the following lines:
ssl_certificate_file=/mnt/kd/ssl/webinterface.pem
ssl_certificate_key_file=/mnt/kd/ssl/webinterface.pem
Then you must “Restart Asterisk FOP2” (not just Reload) in order for SSL to be enabled.
Tip -> For any browser: You need to accept an URL exception for the certificate because it's self-signed (for the hostname or the IP).
Tip -> For Firefox 22+: You need to add a separate URL exception for “https://hostname:4445/fop2/” and then again
connect to “https://hostname/fop2/” (do the same for the IP if no hostname).
Tip -> For Firefox 74 you might need to re-enable TLS 1.0 +1.1 as a workaround.
Since version 2.31.28 (mid 2020) FOP2 does finally support TLS 1.2 (within AstLinux 1.3.10 or later)!
Mac OS X
- Safari 5-13 (10.5-10.13) work fine with HTTPS
- Firefox 22+ (10.6-10.13) works fine with the above workaround(s)
- Firefox 3.6 (10.5) works fine with HTTPS
- Chrome works fine with HTTPS
Windows
- Firefox 22+ (XP SP3, Win7 x86, Win10) works fine with the above workaround(s)
- Chrome works fine with HTTPS
- IE8 (XP SP3) + IE10 (Win7 x86) works fine with HTTPS
- it needs Flash to be installed
- you need to install the certificate (it's normally signed on the hostname)
- for the IP address I needed to add the https URL as an exception to the Security/Intranet options
iOS
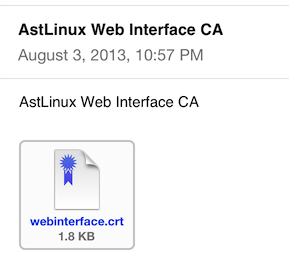
Using the AstLinux CLI, Email the web interface CA to your iOS device:
openssl x509 -in /mnt/kd/ssl/webinterface.pem > webinterface.crt
echo "To: me@mydomain.com
From: me@mydomain.com
Subject: AstLinux Web Interface CA" \
| mime-pack "AstLinux Web Interface CA" webinterface.crt "application/x-x509-ca-cert" \
| sendmail -t
Next, check your email on your iOS device

and tap the certificate icon. Follow the prompts and install the certificate into your profile.
Note -> Be certain you don't email the /mnt/kd/ssl/webinterface.pem file, as that file contains a private key that must be kept secure.
Alternatively AstLinux 1.2.8 or later is required, the webinterface.crt file from above can be emailed as an attachment using the mail command:
mail -r me@mydomain.com -s "AstLinux Web Interface CA" -a webinterface.crt me@mydomain.com </dev/null
or using an interactive terminal session …
mail -r me@mydomain.com -a webinterface.crt me@mydomain.com
Subject: AstLinux Web Interface CA
Here is the certificate you created
for iOS.
finish by entering: Return Ctrl+D