HPE ProLiant MicroServer Gen10 AMD X3421
Note: AstLinux 1.3.6 or later is required
Board Specifications: QuickSpecs User Guide Review Overview Video
Note -> The description below applies to running AstLinux “bare metal”. Alternatively, this same hardware is well equipped to run a VM hypervisor with AstLinux running as a “guest VM”.
AstLinux Board Type:
- “genx86_64” (Video Console: VGA)
Complete System Recommended Options:
- Memory: 288-pin 8GB DDR4 1Rx8 PC4-2400T (Included)
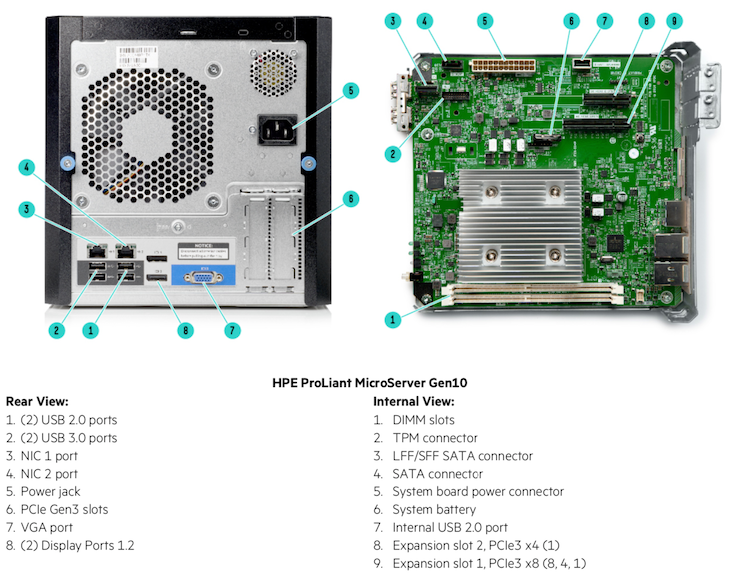
- Internal USB Drive: Remove ClearOS USB Drive (Included)
- Storage: 2.5“ SATA SSD with ORICO 2.5 to 3.5 Hard Drive Adapter Tray
Total System Power: 16 Watts when idle.
Performance: 28.0 secs. (Single-core test, lower is better)
time ( echo "scale=3456; 4*a(1)" | bc -l )
Configuration:
/mnt/kd/rc.conf.d/user.conf
SENSEMODS="k10temp"
/mnt/kd/sensors.conf
# libsensors configuration file
# -----------------------------
# HPE ProLiant MicroServer Gen10

# k10temp CPU sensor
chip "k10temp-pci-00c3"

label temp1 "CPU Temp"
BIOS NIC Setup for Ethernet PXE Boot (disable):
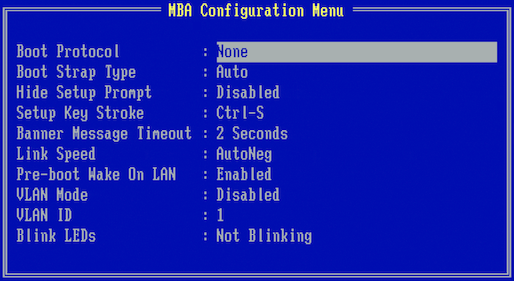
On startup press the Control-S key to enter the BIOS NIC Setup, For each of the two NIC's, make the following changes…
Boot Protocol → NoneBanner Message Timeout → 2 Seconds
The results should look like the following screen…
BIOS Setup for Restore AC Power Loss:
The Energy-Related Products Directive (ERP) is the European Commission Directive required for products sold and exported to the EU. As such the HPE MicroServer does not automatically power on after a power failure. Obviously this feature needs to be disabled.
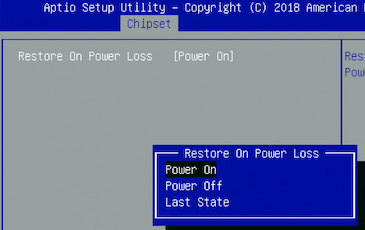
On startup press the F2 key to enter the BIOS Setup, go to the “Chipset” → “Restore On Power Loss” . Make the following changes…
Restore On Power Loss → Power On
The results should look like the following screen…
BIOS Setup for Boot Mode (non-UEFI):
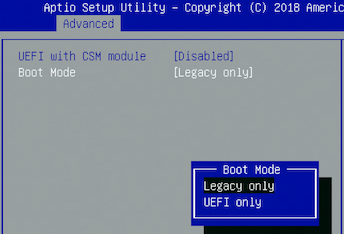
While in the BIOS Setup as above, make certain Legacy only boot is enabled, go to the “Advanced” → “Boot Mode” menu…
Boot Mode → Legacy only
The results should look like the following screen…
Save the above BIOS changes, reboot.
Tip -> If you need to choose the boot drive, for example when booting the ISO Installer via a USB drive, on startup press the F11 key.
Note -> The final HPE boot screen with the QR code displayed appears for 40 seconds, there does not appear to be a way to shorten this boot delay.
Photos:
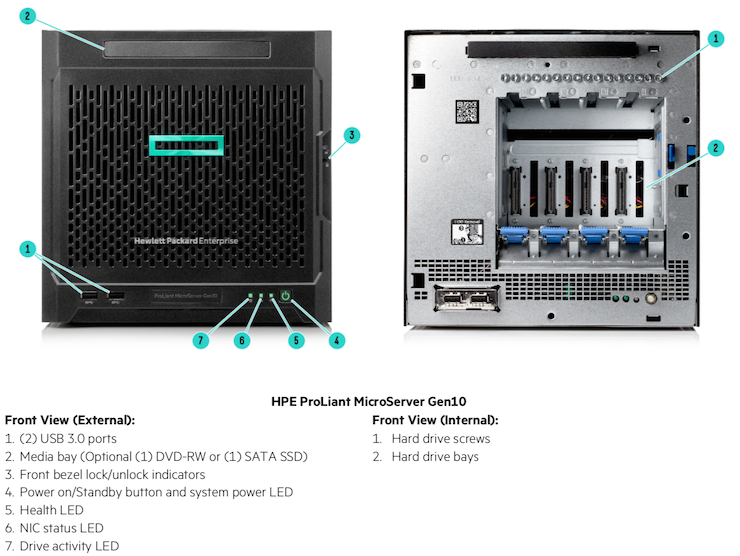
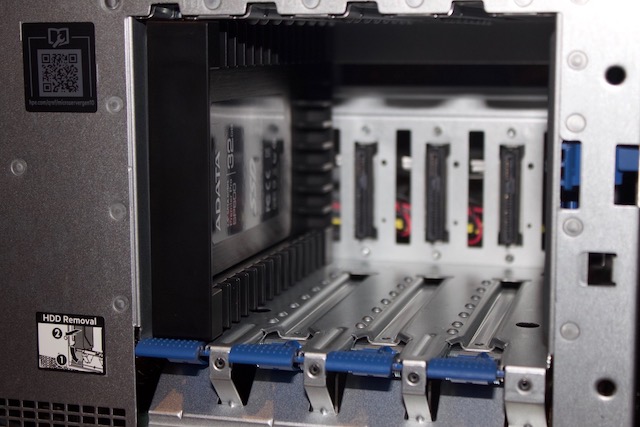
2.5“ SATA SSD with ORICO 2.5 to 3.5 Hard Drive Adapter Tray